Map Tiling in React Native using Mapbox
In this article, we will see how to implement Map Tiling using a Tiling Server and integrate it into our React Native Project.

A web developer looking to learn and build the most breathtaking projects. Interested in all things Javascript/Typescript. Hopping from one framework to another.
We will use the rnmapbox/maps library to achieve Map Tiling in React Native and Mapbox Tiling Server which is provided by Mapbox.
Requirements
React Native App Setup
Mapbox Account
Create Access token
Head on over to the Mapbox Dashboard. Then create a new private key by clicking on the Create Token button.
Fill in the details and select the scopes you want the key to have access to, keeping all the default ones selected and
TILESETS: READwill be enough.
Then click on Create Token. Now you have a secret token, keep this safe with you for use in the next step.

Scene Setup
Let's install the library in our React Native App
npm install --save @rnmapbox/maps
Follow the steps for setting up the library according to the official docs. Use the private key that was created in the previous step, wherever required.
Set the
setAccessTokenin the MapboxGL object with the private key we obtained in the previous step, like so in the entry point of the App.import MapboxGL from '@rnmapbox/maps'; MapboxGL.setAccessToken(MAP_BOX_ACCESS_TOKEN);Add a simple MapView to the scene.
 import React from 'react';
 import {SafeAreaView, StatusBar, useColorScheme, View} from 'react-native';
 import {Colors} from 'react-native/Libraries/NewAppScreen';
 import MapboxGL from '@rnmapbox/maps';
 import {MAP_BOX_ACCESS_TOKEN} from './config';

 MapboxGL.setAccessToken(MAP_BOX_ACCESS_TOKEN);

 function App(): JSX.Element {
   const isDarkMode = useColorScheme() === 'dark';
   const backgroundStyle = {
     backgroundColor: isDarkMode ? Colors.darker : Colors.lighter,
   };

   return (
     <SafeAreaView style={backgroundStyle}>
       <StatusBar
         barStyle={isDarkMode ? 'light-content' : 'dark-content'}
         backgroundColor={backgroundStyle.backgroundColor}
       />
       <View style={{height: '100%'}}>
         <MapboxGL.MapView style={{flex: 1}} />
       </View>
     </SafeAreaView>
   );
 }

 export default App;
Now we have a basic Map.
You can add a camera if you want to focus on particular coordinates or react to certain events, while it is not necessary, I am adding one so that we can view the 3D terrain.
  <MapboxGL.Camera
     centerCoordinate={[83.931, 28.5983]}
     pitch={60}
     zoomLevel={8}
  />
Here we have added pitch so that the camera is not directly over our scene, and centerCoordinates is given a coordinate near the Himalayan Mountain range, to help distinguish the terrain.
Create a Style
Head over to Mapbox Studio and click on New Style
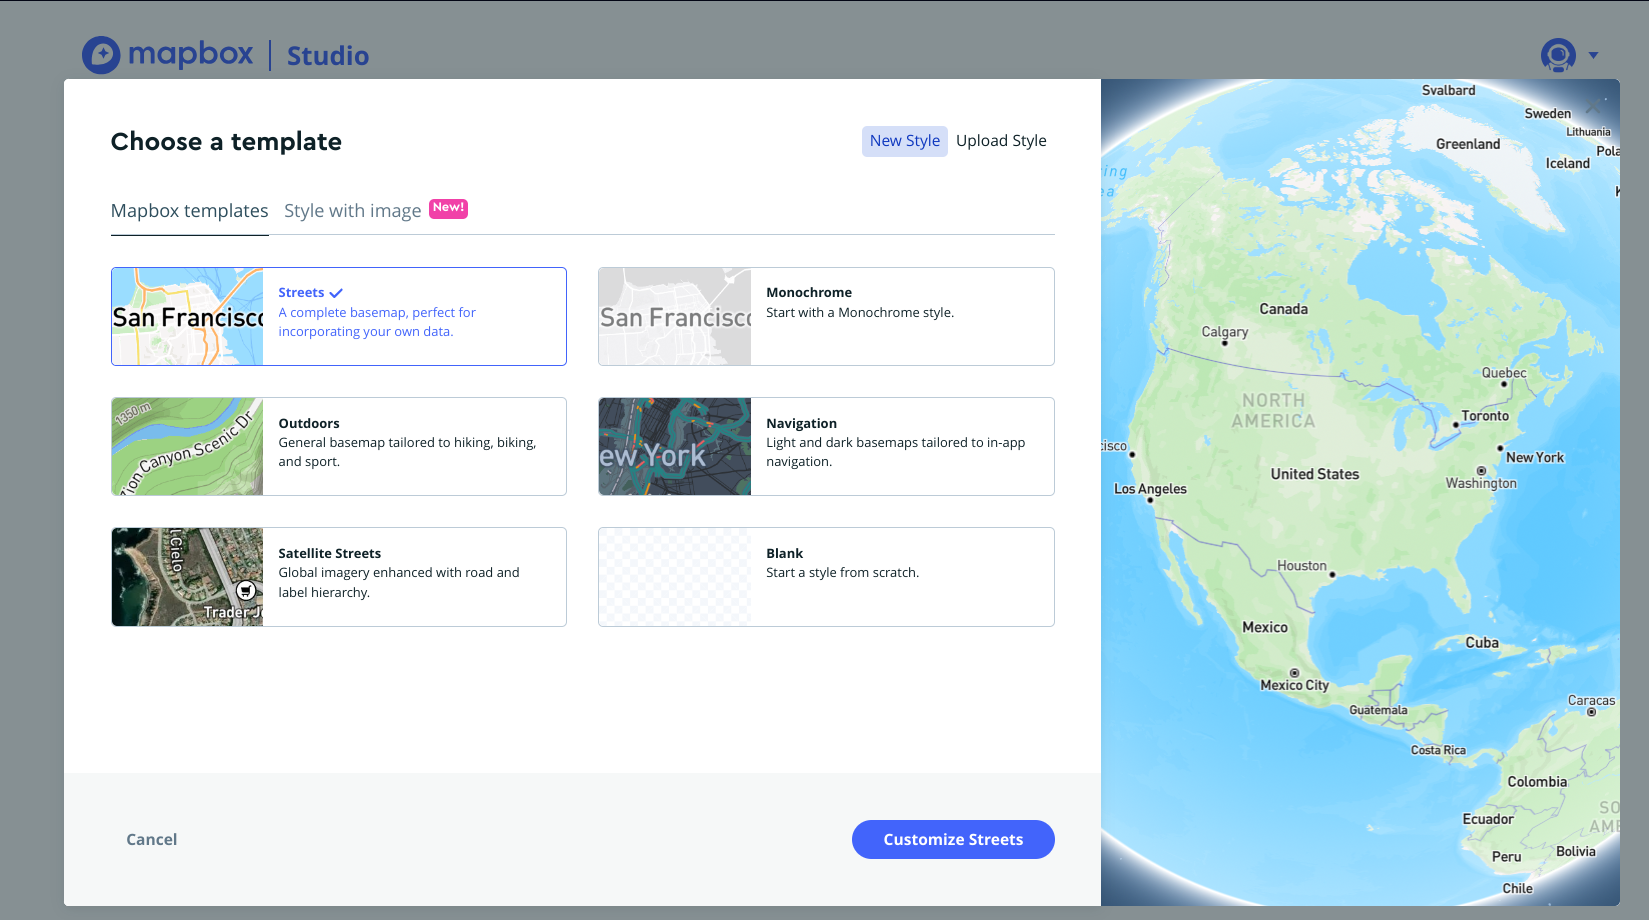
Then select from the list of default templates provided by Mapbox according to your preferences. Once you're done click on the blue Customize button.
This will redirect you to the Mapbox Map editor. Make all required changes to the map. Click on Publish once done.

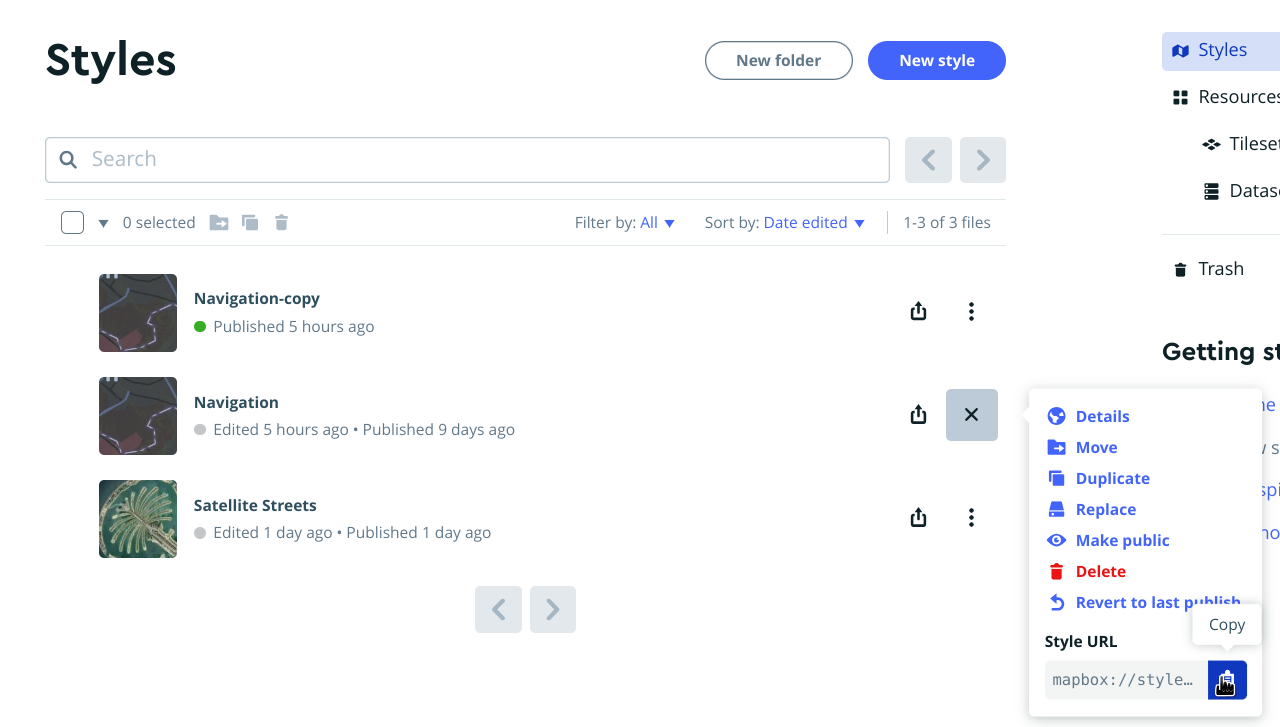
Back in the Styles panel in the Studio, copy the StyleURL of the newly created style.
Adding Tileset
A tileset can be added in 2 ways
We can add it as a layer to our style from Mapbox Studio and apply it to the Map
Add it as a separate layer through our code, this lets us make changes to the layer.
Depends on the use case, if you want to make changes to the layer as an app functionality then, option 2 would be better.
We go to the Tileset page, and we can add a custom Tileset (GeoJSON, CSV, Shapefile, etc.) or use one of the default tilesets provided by Mapbox. Which is what we will be using.
Select a Tileset and copy the Tileset ID

Else if we uploaded a custom Tileset then similar to publishing a Style, we can publish the Tileset and copy the generated ID.
If we want to add this Tileset as a layer of the Style that we will be adding to our map then, head on over to the Mapbox Studio again and open your map in the Editor.
Click on the
+icon in the side Navbar and Select a source from the Source Dropdown. This Dropdown will have your Tileset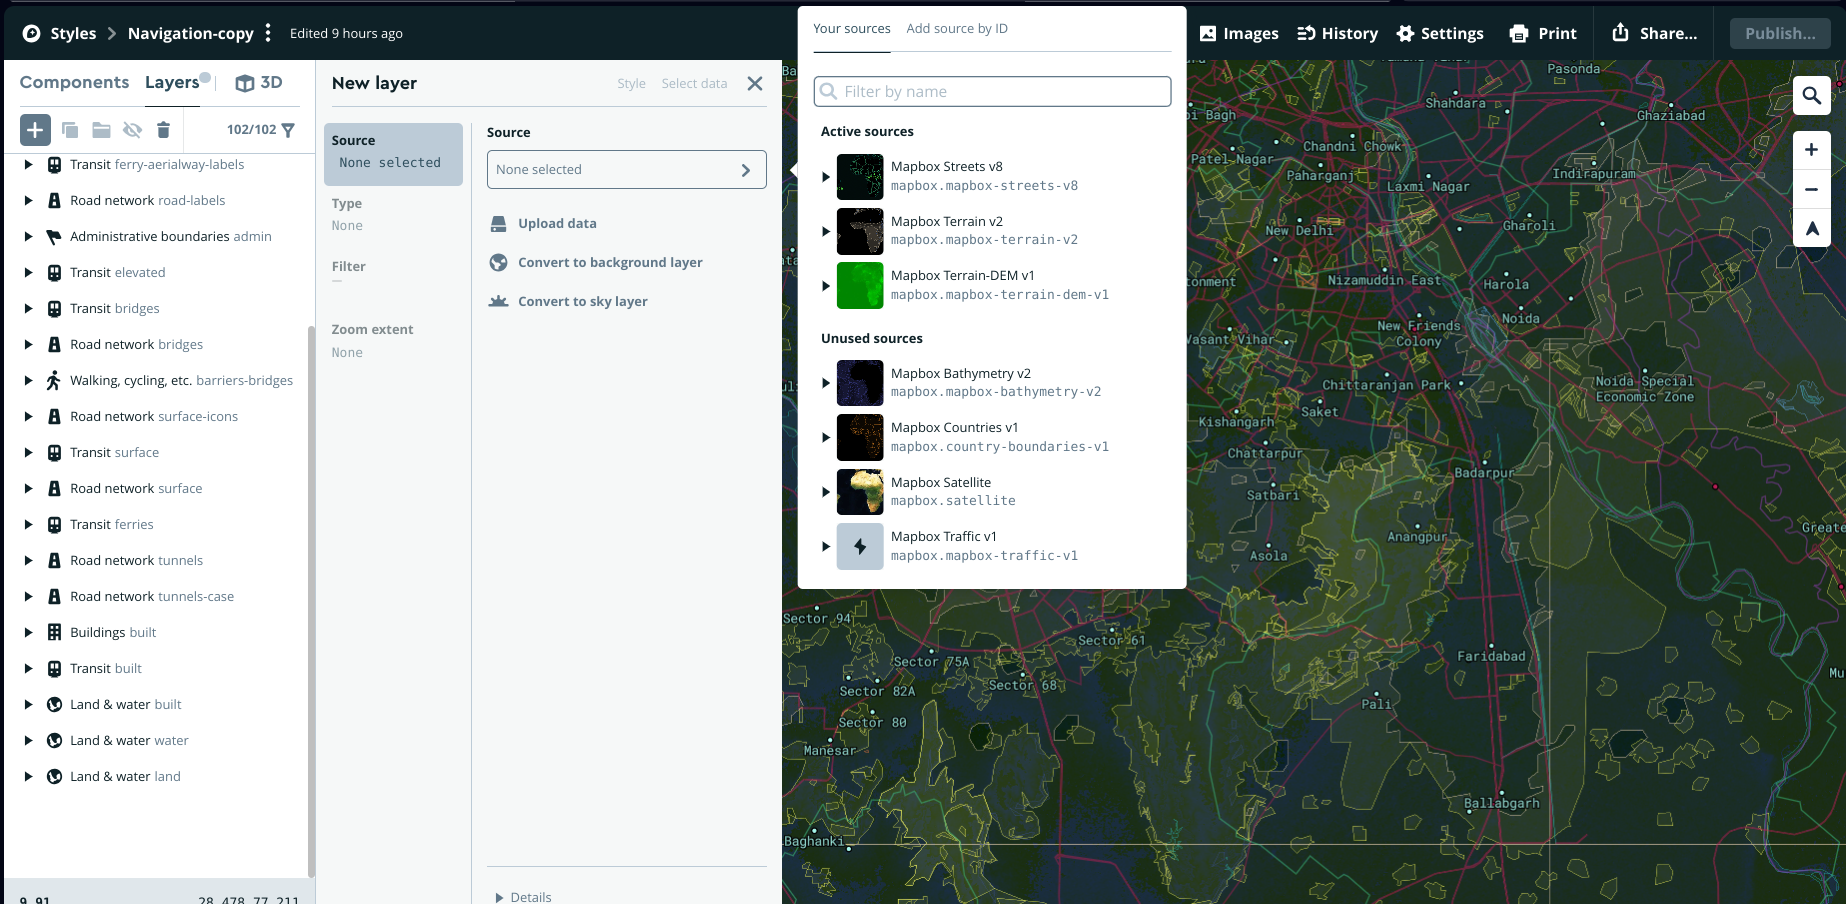
Again, once you're done click on Publish to save your changes.
Adding Styles, Tileset to Map
Now, that we have a basic scene, we will proceed with adding a Style to the Map. Copy the StyleURL for the Style and pass it as the StyleURL to the MapView component
 <MapboxGL.MapView
     style={{flex: 1}}
     styleURL="mapbox://styles/developer112/cljbmltym005z01mgd6uz1ht3"
 >
Default Map Style

After adding our Custom StyleURL
Now, if we want to add a tileset separately then, I will use one of the default available tilesets to show this.
Go to the Tilesets page and copy the TilesetID, which in my case is
mapbox.mapbox-terrain-dem-v1. Add 'mapbox://'. Making our URL for the Tileset'mapbox://mapbox.mapbox-terrain-dem-v1'. The URL is served by the Mapbox Tiling Server. Andrnmapboxhas support for this Tiling Server.Since this is a Raster_Dem Source we will add it as such in our MapView
 {/* terrain */}
 <MapboxGL.RasterDemSource
     id="source-terrain"
     url={'mapbox://mapbox.mapbox-terrain-dem-v1'}
 >
 </MapboxGL.RasterDemSource>
Now that we have added the Source, we can now add the Terrain to the Map
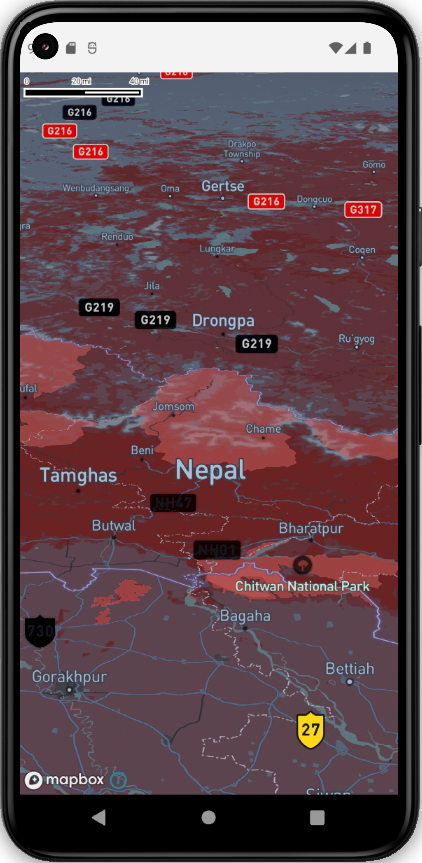
 {/* terrain */}
 <MapboxGL.RasterDemSource
     id="source-terrain"
     url={'mapbox://mapbox.mapbox-terrain-dem-v1'}
 >
     <MapboxGL.Terrain
         sourceID={'source-terrain'}
         style={{rasterOpacity: 1, exaggeration: 10}}
     />
 </MapboxGL.RasterDemSource>
SourceID is used to refer to the ID of the Source.
Exaggeration exaggerates the elevation of the terrain by multiplying the data from the DEM with this value. This helps us see the peaks more easily
Else if you have a Tiling Server with a custom URL then use the
tileUrlTemplatesprop. For eg.<MapboxGL.RasterDemSource id="source-terrain" tileUrlTemplates={[ 'https://tiling-server-example.com/raster-tiles/{z}/{x}/{y}.png' ]} >where x,y, and z will be coordinates that indicate the position of the tile, all of this will be handled by the Mapbox component.
Now the output will look like
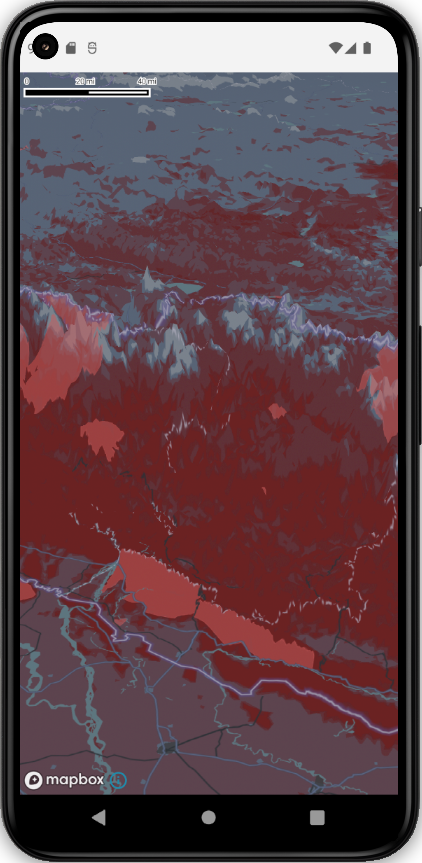
And the final Code is
 import React from 'react';
 import {SafeAreaView, StatusBar, useColorScheme, View} from 'react-native';
 import {Colors} from 'react-native/Libraries/NewAppScreen';
 import MapboxGL from '@rnmapbox/maps';
 import {MAP_BOX_ACCESS_TOKEN} from './config';

 MapboxGL.setAccessToken(MAP_BOX_ACCESS_TOKEN);

 function App(): JSX.Element {
   const isDarkMode = useColorScheme() === 'dark';
   const backgroundStyle = {
     backgroundColor: isDarkMode ? Colors.darker : Colors.lighter,
   };

   return (
     <SafeAreaView style={backgroundStyle}>
       <StatusBar
         barStyle={isDarkMode ? 'light-content' : 'dark-content'}
         backgroundColor={backgroundStyle.backgroundColor}
       />
       <View style={{height: '100%'}}>
         <MapboxGL.MapView
           style={{flex: 1}}
           styleURL="mapbox://styles/developer112/cljbmltym005z01mgd6uz1ht3">
           <MapboxGL.Camera
             centerCoordinate={[83.931, 28.5983]}
             pitch={60}
             zoomLevel={7}
           />

           {/* terrain */}
           <MapboxGL.RasterDemSource
             id="source-terrain"
             url={'mapbox://mapbox.mapbox-terrain-dem-v1'}>
             <MapboxGL.Terrain
               sourceID={'source-terrain'}
               style={{rasterOpacity: 1, exaggeration: 10}}
             />
           </MapboxGL.RasterDemSource>
         </MapboxGL.MapView>
       </View>
     </SafeAreaView>
   );
 }

 export default App;
There might be better ways to achieve the same, I just added what worked for me. Open to any improvements, doubts, or errors.
Thank you for reading. Happy Learning!


